


For a project I am working on I really wanted to continuously deploy to heroku for testing. Continous deployment provides some real benefits when developing software, so I’m writing this up incase somebody else wants to have a go. This post assumes you already have a project setup in GitHub that you want to deploy.
The setup is split up into two main steps. The build process (Travis) and the deployment process (Travis/Heroku).
Heroku Setup
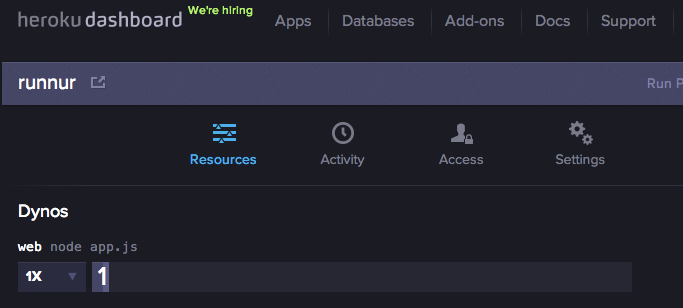
The first thing you want to do is create yourself an application in heroku to deploy to. At the time of writing Heroku give you 750 hours on a 1x Dyno for free each month, so it shouldn’t cost anything initially. You can sign up here.
Once your account is setup, create yourself an application in the manager. After you have filled all the details in and it has all created successfully, make sure you grab your api key from your account options as you will need it when setting up Travis.
Travis Setup
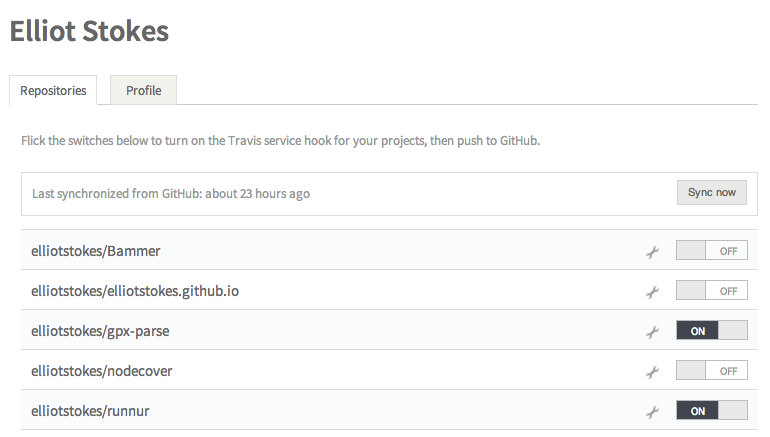
To get Travis to build your project you need to first log-in to Travis and enable the repositories you want to build. To do this click on the Accounts option and flick the appropriate switches.
Once you have enabled travis on your repositories you need to tell it what to do. This is done by adding a .travis.yml file to your repo. Below is the .travis file I used.
language: node_js
node_js:
- '0.10'
deploy:
   provider: heroku
   app: runnur
   api_key:
      secure: SECUREKEYHERE...
You can also see the file here.
The file is firstly defining what platform you are using, what version of that platform to test against and then where to deploy. Notice that when you deploy to Heroku you have to provide your api_key (the key we grabbed earlier). If your repository is public then you are probaby not going to want to send it up unencrypted for the whole world to see. The travis cli tools provide a function to encrypt parts of your .travis.yml file.
Encrypting your api_key
Install the Travis command line tools. The tools are provided as a Ruby gem so you just need to run:
$ gem install travis
Once that has completed add your ap_key to the file. You run this command in the folder that contains your .travis.yml file:
$ travis encrypt YOUR_API_KEY --add deploy.api_key
This command should automatically update your travis file with the encrypted api_key. Take the opportunity to check your .travis file to ensure the app name is correct and save.
Final steps
Now your almost ready to go. All you need to do is to make a few changes to your package.json file. When Travis runs, after it has run npm install and installed all your dependencies it’s going to run the command:
$ npm run test
This is going to run your tests within Travis. To set this up you need to add a test command to the scripts section of your file. I am using nodeunit for my tests so my command is:
"scripts": {
    "test": "node_modules/.bin/nodeunit tests/"
  }
Once that’s all done push it up to GitHub. This should then force a build within Travis, which in turn should deploy to your Heroku app instance. Go and have an ice cream, you deserve it!